Needlepoint Bookmarks: Canvas, Size and How to Finish One
A needlepoint bookmark is one of the smallest projects you can stitch on canvas. It takes little thread, it travels well, and you can finish it yourself at home. This guide covers the canvas, the size, the stitches, and the finishing steps.
Canvas and size
A good first size is 2 inches wide and 6 inches long. Choose a fine canvas so the bookmark stays thin. On 18 mesh you get small, neat stitches. On 14 mesh the holes are easier to see.
| Canvas mesh | Stitches across 2 inches | Stitches along 6 inches | Threads that fit |
|---|---|---|---|
| 13 mesh | 26 | 78 | Soft matte cotton, size 3 pearl cotton, wool, silk |
| 14 mesh | 28 | 84 | Soft matte cotton, size 3 pearl cotton, wool, silk |
| 18 mesh | 36 | 108 | Size 5 pearl cotton, stranded cotton floss, silk |
Our guide to needlepoint canvas mesh sizes explains mesh in detail, and our thread guide covers the fibers.
Cut the canvas with at least 1.5 inches of bare canvas on every side. Tape the edges so they do not fray or catch the thread. See blank needlepoint canvas for how to prepare it.
Designs that suit a bookmark
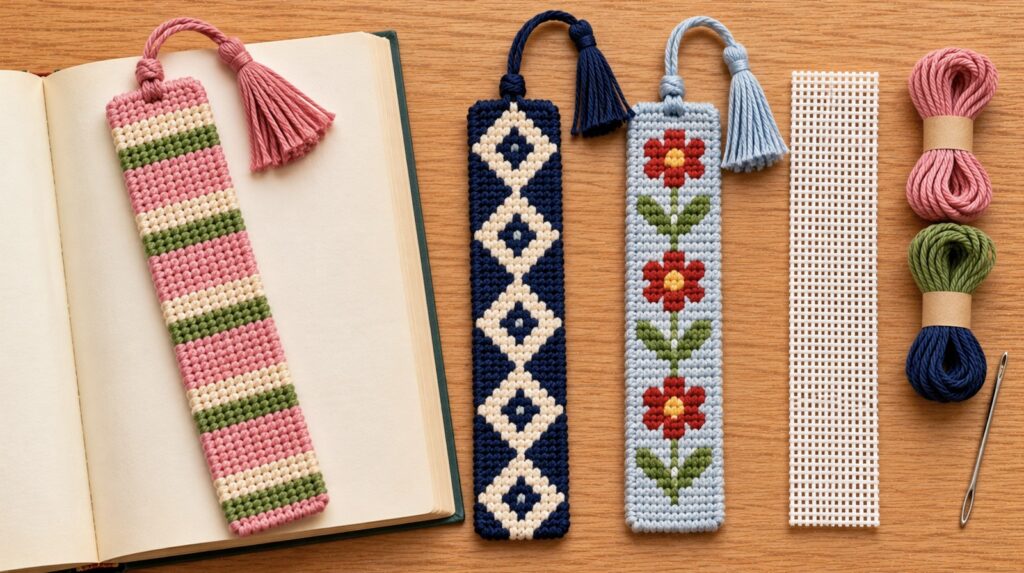
- Stripes, across or along the strip.
- A repeating diamond or zigzag.
- A monogram with a solid background.
- One small motif, repeated three or four times.
- A painted bookmark canvas, where you follow the printed colors.
Which stitch to use
Use tent stitch for letters and small details. Use basketweave for the background, because it pulls the canvas out of shape less. For a simple bookmark with texture, try one of the background stitches.
How to finish a needlepoint bookmark
- Block it. If the canvas has pulled into a slanted shape, block it square first. Our finishing guide explains how.
- Trim the canvas. Leave about half an inch of bare canvas on every side.
- Fold the edges back. Fold the bare canvas to the back along the last row of stitches. Trim each corner at an angle first, so the folds lie flat.
- Cut a backing. Cut a piece of felt the same size as the stitched area.
- Add a tassel. Tuck the top of a tassel or a loop of ribbon between the canvas and the felt at one end.
- Sew it closed. Stitch the felt to the edge of the needlepoint with small stitches in matching thread.
If you prefer not to sew, attach the felt with fabric glue and let the bookmark dry flat under a heavy book.
Easier options
- Plastic canvas. It does not fray, and you can cut it to shape before you stitch.
- Cross stitch. A cross stitch bookmark uses soft fabric and needs less finishing. See cross stitch bookmarks.