Needlepoint Pillow Kits: What to Know Before You Buy
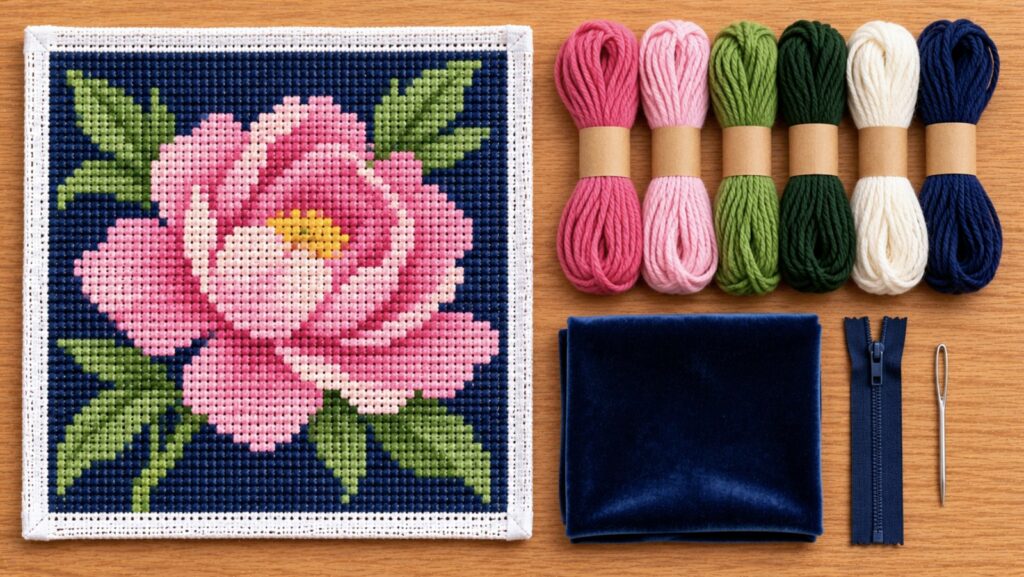
A needlepoint pillow kit gives you a pillow-size canvas with the design on it, plus the yarn and a needle. Most kits stop there. The backing fabric, the zipper, and the pillow insert are usually separate. This guide explains what to check before you buy and how the pillow comes together at the end.
What a pillow kit includes
| Usually included | Often not included |
|---|---|
| Canvas with the design printed or painted on it | Backing fabric |
| Yarn in every color | Zipper |
| A tapestry needle | Pillow insert |
| Instructions | Frame or stretcher bars |
We checked four pillow kit listings from three makers in November 2026. All four included the canvas. Three included yarn, a needle, and instructions, and one sold the thread as an optional extra. None included the backing fabric or the pillow insert. So read the listing. “Pillow cover kit” or “cushion front” usually means you get the stitched front only.
What to check before you buy
- Finished size. The kits we checked finish at 14 or 16 inches square. Check that the size suits your chair or bed.
- Mesh. This changes the project more than anything else. The kits we checked ranged from 4.5 mesh, with big holes and thick yarn that fill fast, to 12 and 14 mesh, which show far more detail and take far longer. See needlepoint canvas mesh sizes.
- Stitch. Some large-mesh kits use cross stitch or half cross stitch. Fine-mesh kits use tent stitch.
- Yarn fiber. Wool wears well on a pillow that gets used. Acrylic costs less and suits decorative pillows.
- Printed or painted. Both work. See printed vs hand-painted canvas.
- Number of colors and shading. Flat areas of color are easier than fine shading.
- What is missing. Add the cost of backing, a zipper, and an insert, or of professional finishing.
How long does a pillow take?
A pillow is a big project. A 14 inch design on 13 mesh has about 33,000 stitches. The same size on 10 mesh has about 19,600. Most people work on a pillow for weeks or months, a little at a time. If you have never done needlepoint, finish something small first. See needlepoint kits for beginners.
Tips for stitching a pillow
- Use a frame. A large canvas pulls out of shape more than a small one. See needlepoint frames.
- Use the basketweave stitch for large areas such as the background. It distorts the canvas less than the continental stitch.
- Ask your finisher, or check your pattern, whether to stitch a few extra rows around the design. Extra rows can disappear into the seam, so no bare canvas shows at the edge.
- Keep the yarn labels until you finish, in case you need more of a color.
How a needlepoint pillow is finished
- Block the canvas. Pin it flat and square, dampen it lightly, and let it dry.
- Trim. Cut the bare canvas to about half an inch around the stitching.
- Cut the backing. Cut backing fabric to the size of the front, including the seam allowance.
- Sew. Pin the front and back with right sides together. Sew around the edge, right at the edge of the stitching, and leave a gap on one side.
- Turn it right side out and push out the corners.
- Add the insert. An insert slightly larger than the cover gives a full, plump pillow.
- Close the gap by hand, or sew in a zipper so you can remove the cover.
You can do this yourself with a basic sewing machine, or pay a professional finisher. Compare the two in needlepoint finishing.