Cross Stitch Bookmarks: Sizes, Patterns and How to Finish One
A cross stitch bookmark is one of the best small projects you can make. It is narrow, it uses little thread, and it turns into a gift people use. This guide covers the size to stitch, the fabric to use, the kinds of patterns that work, and how to finish the bookmark so the back looks neat.
How big is a cross stitch bookmark?
Most finished bookmarks measure about 2 by 7 inches. A larger one runs about 3 by 8 inches. On 14-count Aida, that gives you this much room for the design:
| Finished size | Design area on 14-count |
|---|---|
| 2 x 7 inches | About 28 x 98 stitches |
| 3 x 8 inches | About 42 x 112 stitches |
Leave a few empty squares around the design, so the stitches do not sit right on the edge. Check any size with our fabric calculator.
Which fabric to use
- Aida: the easy choice. Use 14-count for a first bookmark, or 16 or 18-count for finer detail in the same space.
- Stitch band: a woven strip of Aida or linen with finished side edges. You only have to finish the two short ends.
- Perforated paper or plastic canvas: stiff sheets you stitch on and then cut to shape. They do not fray.
See our cross stitch fabric guide for more on counts.
Patterns that work on a bookmark
A bookmark is tall and narrow, so pick designs that stack or repeat.
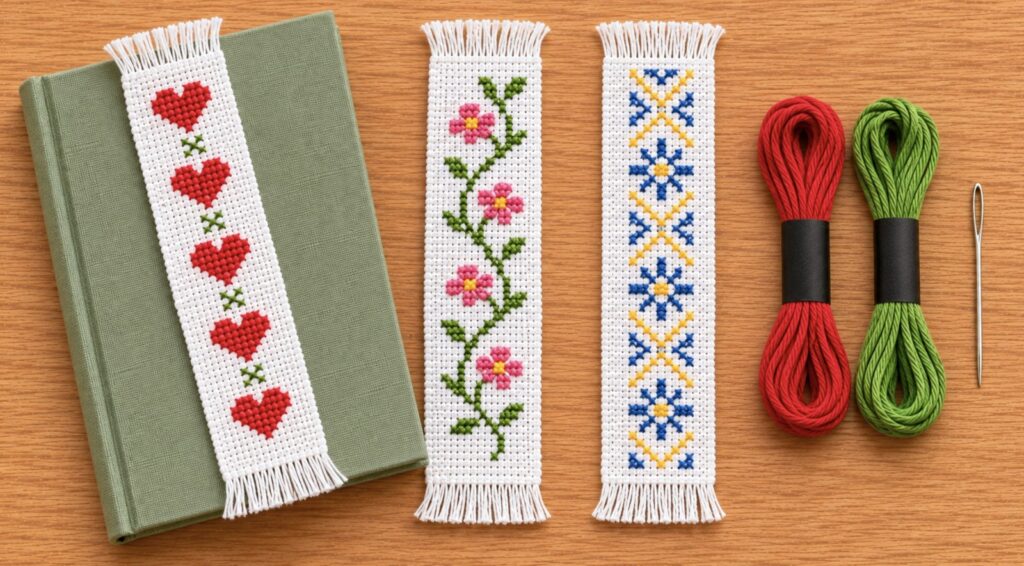
- A repeating motif, such as hearts, stars, or leaves, one above the other.
- A vine or a tall flower that climbs the strip.
- A geometric band or border pattern.
- A name or a short word, stitched down the length. Make the chart with our font generator.
- One small picture with a simple border above and below.
Our free cross stitch patterns are small enough to stack on a bookmark. To draw your own, print our graph paper.
How to finish a cross stitch bookmark
The back of a bookmark shows, so it needs a backing. This is one simple hand-sewn method:
- Stitch first. Finish the whole design before you cut the fabric to size.
- Press. Iron the piece face down on a towel.
- Trim. Cut around the design and leave a half inch margin on every side. Cut a piece of backing fabric the same size.
- Clip the corners to reduce bulk. Do not cut right up to the stitches.
- Fold the margins to the back on both pieces and press them. Keep the folds straight along the fabric threads.
- Pin the two pieces together, with the folded edges inside.
- Sew around the edge with two strands of floss in a color that matches the fabric.
Other ways to finish
- Add a stiffener. Sandwich a layer of interlining between the front and the backing before you sew.
- Fringe the ends. Sew a line of stitches across each short end, then pull out the cross threads below it.
- Use a stitch band. Fold or fringe the two short ends and you are done.
- Add a tassel at the top or bottom.
Tips
- Keep the back flat. Do not use knots, and weave the thread ends under a few stitches.
- Choose colorfast thread, since a bookmark gets handled.
- Use 2 strands of floss on 14-count Aida. See our cross stitch thread guide.
- New to cross stitch? Start with how to cross stitch for beginners.